When it comes to cookies, there’s nothing quite like the rich flavor of Thick Brown Butter Chocolate Chip Cookies. This recipe stands out because of its unique process and ingredients. The brown butter adds a depth of flavor that regular butter just can’t match, making these cookies a delightful treat.
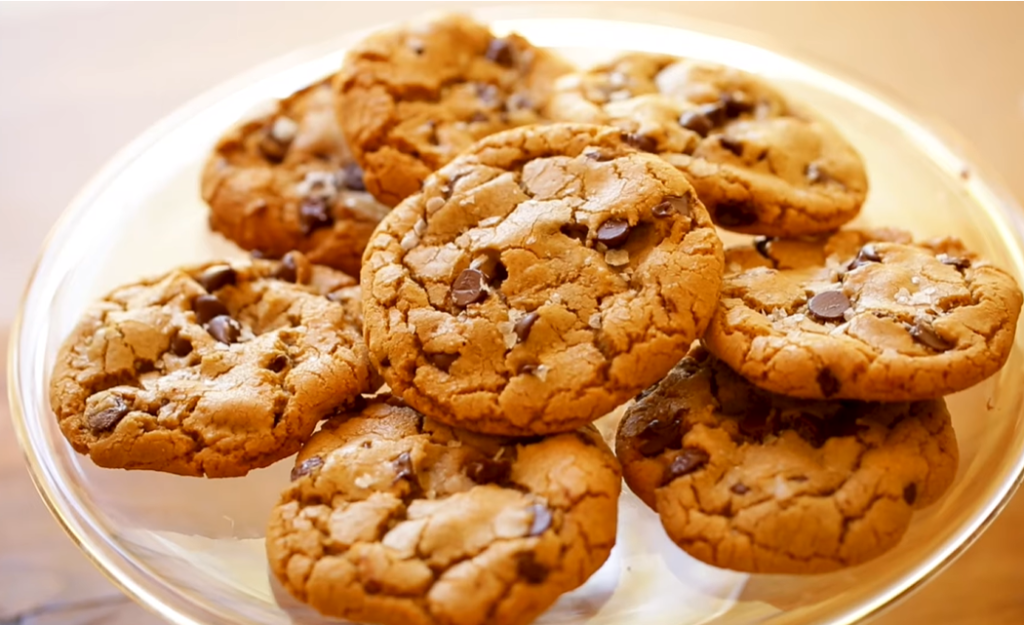
Creating this recipe was a journey that involved multiple trials and several batches of testing. To perfect these chocolate chip cookies, there were countless nights of late-night brainstorming and a lot of hard work. The result? The result is a cookie that is crispy on the edges, chewy in the center, and packed with chunks of chocolate.

WHY THESE CHOCOLATE CHIP COOKIES ARE THE ULTIMATE TREAT
Listen up, cookie lovers! While there are countless recipes out there claiming to be the best, I understand your skepticism. However, let me make my case for why these thick brown butter chocolate chip cookies truly are the best ever. First, the perfect texture sets them apart. These cookies are crispy on the edges, gooey and chewy in the middle, and absolutely oozing with chocolate. The combination of flavors is expensive and luxurious, thanks to the nutty richness of the brown butter, the just-right sugar quantity, and the way the chocolate flavor shines through every bite.
- The simplicity of this easy, no-fuss recipe makes it a winner.
- There’s no need for a mixer or to cream the butter and sugar together—something we all dread.
- Through different methods and lots of experimentation, I’ve created a recipe that is not only delicious but also a joy to make.
Don’t believe me? Check out some of the rave reviews I’ve received about these cookies:
“These cookies were so good that we devoured them immediately! I’m already planning to make another batch—they’re absolutely the best I’ve ever made. Thank you for sharing this sinful, perfect blend of ooey, gooey, chewy, and chocolatey goodness!”
@crazelade
“Tried this today… and I must say, this is the best chocolate chip cookie recipe I’ve baked—I might just eat the entire thing! 🍪😊”
@ovenlymadebykc
“I made these and they were awesome! So many creators on this app claim to have the best, but these were the best I’ve tried.”
@whatmelydid
STEP-BY-STEP GUIDE TO PERFECT COOKIES
1. BROWN THE BUTTER
Browning butter transforms it into a culinary magic trick. In a non-stick pan over medium-low heat, the process begins with melting the butter until its solids separate from the fat. As the minutes pass, you watch it closely, ready to stop as soon as it turns that light brown shade, avoiding the dreaded burn. This stage is crucial—capturing that beautiful, caramelly, nutty aroma elevates dishes from ordinary to extraordinary. Whether for savory sauces or indulgent desserts, mastering the art of browning butter adds depth and complexity that mere melted butter can’t achieve.

2. MIX IN THE SUGARS
When perfecting cookies, sugar mixing is key. Here’s a secret technique I swear by: after browning the butter in a pan over low heat on a small burner, I swiftly whisk in a blend of light, brown, and white sugars for just a couple of minutes. This gentle heat aids in dissolving the sugars without the need for an electric beater, ensuring a smooth blend that creates that desirable caramelly flavor without risking crystallization. It’s a delicate process, but when done right, it transforms your cookies into something truly special.

In my baking journey, mastering the art of mixing in the sugars has been a game-changer. It’s not just about technique; it’s about understanding how heat and timing impact flavor and texture. By taking these meticulous steps, you can elevate your baking skills and delight friends and family with cookies that are both delicious and perfectly balanced in sweetness.
3. ADD THE EGG & YOLK
When preparing to add the egg and yolk, start by allowing the butter and sugar mix to rest for about 5–10 minutes. The time may vary based on different factors, but the goal is for the mix to be warm, not hot. This step is crucial for achieving the right consistency and preventing the eggs from cooking prematurely.

Next, break in the egg and egg yolk, and whisk them vigorously for 1 to 2 minutes. This vigorous whisking helps the sugars almost fully dissolve, resulting in a smooth, caramel-colored mixture. The key here is to ensure that the sugars are well incorporated and the mixture has a rich, uniform texture
4. FOLD IN THE DRY INGREDIENTS
To achieve the perfect cookie dough, it’s essential to properly fold in the dry ingredients. Start by adding the flour, baking powder, baking soda, and salt to your mixture. Using a spatula, carefully combine the ingredients until the flour is nearly incorporated.

Leave a few streaks of flour unmixed to avoid overworking the cookie dough. This method ensures the cookies maintain a tender and chewy texture.
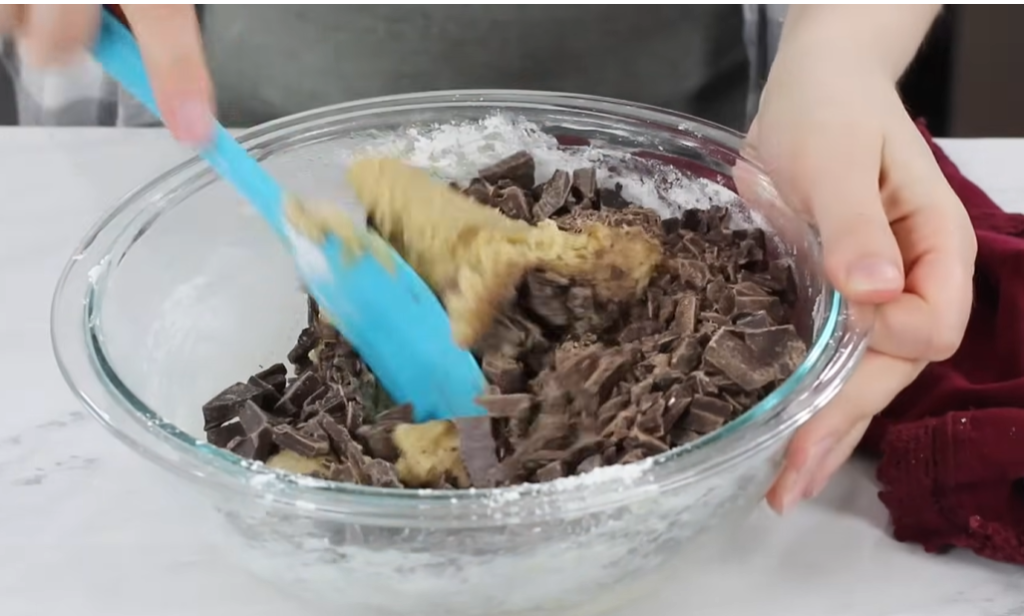
5. FOLD IN THE CHOPPED CHOCOLATE
When it’s time to fold in the chopped chocolate, make sure your dough is not too warm to prevent it from melting. If your environment is warm or you’ve chopped the chocolate very small, let the dough cool before adding it. This step is critical for achieving the perfect cookie texture and flavor. Chopped chocolate melts and creates luscious puddles in the cookies, unlike chocolate chips, which remain stable.

Moreover, using chopped chocolate allows for chunks of different sizes, enhancing the texture of your cookies. I like to leave some chunks on the larger side. So remember, for the best results, always opt for chopped chocolate to elevate your cookie game.
6. SCOOP YOUR COOKIES
The article emphasizes the importance of carefully scooping and shaping cookie dough to achieve perfect cookies. By dividing the dough into equal balls using a scoop and avoiding excessive pressure during shaping, you ensure that the cookies maintain their intended size and shape. Adding extra chocolate chunks on top before baking enhances the texture and flavor, creating delightful puddles of melted chocolate. This approach guarantees even baking and delicious results, making the cookie-making process both rewarding and enjoyable.

7. CHILL THE COOKIE DOUGH
To ensure your cookie dough produces the best results, it’s crucial to refrigerate it before baking. This step isn’t just about waiting—it’s about enhancing the final outcome. By chilling the dough for at least 30 minutes (ideally 2 hours), you allow the flavors to meld and deepen, resulting in cookies that are not only delicious but also maintain their shape while baking. This process prevents excessive spread in the oven, ensuring each cookie retains its intended form and texture. The chilling period is like a resting time for the dough, allowing it to mature and develop a more nuanced flavor profile that will delight with every bite.
8. BAKE!
It sounds like you’re ready to bake those cookies! Before you begin, make sure to pre-heat your oven to the right temperature. This step ensures that your cookies bake evenly and perfectly. Depending on your oven calibration and the type of baking sheet you use, the timing may vary slightly. For a softer, more gooey texture, aim for around 10 minutes in the oven. If you prefer your cookies crispy and chewy, leave them in for about 12 minutes. To find your ideal baking time, consider doing a quick test with one cookie to match your personal preference.
When you take the cookies out, remember they might seem a bit underdone, but don’t worry—they’ll continue to cook and set as they cool on the baking sheet. This allows the flavors to develop fully, giving you that perfect homemade cookie experience.

THE BEST CHOCOLATE FOR THESE COOKIES
I often receive a hundred questions a week about the type of chocolate I use in my cookie recipes. To get the perfect mix of dark and milk chocolate that brings out a rich complexity of flavor in my cookies, I typically use semi-sweet varieties. My top choices are Valrhona Caraibe dark chocolate and Valrhona Jivara milk chocolate. These brands provide incredible quality and taste absolutely delicious. I usually buy them in bulk and store them in large containers in my pantry.
For those who don’t have access to Valrhona chocolate, there’s no need to worry. You can find smaller quantities available on Amazon and in some Whole Foods stores. Furthermore, other high-quality chocolate bars, such as Lindt or Ghirardelli, work wonderfully. These alternatives ensure that you still achieve the same outstanding flavor in your cookies without compromising on quality.
FREQUENTLY ASKED QUESTIONS
Why did my butter and sugar mixture turn grainy?
If your butter and sugar mixture crystallized, it’s likely because you cooked it on high heat or for too long. To avoid this, ensure you cook on the lowest heat setting for just 1-2 minutes. The goal is not to caramelize the sugar but to facilitate the dissolving process. If you’re unsure, remove the butter from the heat and then whisk in the sugars. This gentle approach prevents the mixture from crystallizing and ensures a smooth, creamy texture.
IS CHOPPED CHOCOLATE BETTER THAN CHOCOLATE CHIPS?
When deciding between chocolate chips and chopped chocolate for cookies, the choice affects both taste and texture significantly. Chopped chocolate melts into luxurious puddles, enhancing the cookie’s flavor and visual appeal, making it the recommended choice for achieving incredible results. Chocolate chips, while convenient, maintain their shape and offer bursts of sweetness without the same melting effect, impacting the overall cookie experience.
HOW LONG CAN I STORE CHOCOLATE CHIP COOKIES?
To ensure your chocolate chip cookies stay fresh, store them in an airtight container at room temperature for about 3–4 days. For a longer-term storage solution, consider freezing raw cookie dough balls instead. This method allows you to bake fresh cookies on demand by placing a frozen dough ball directly into the oven and adjusting the baking time by an additional 2-4 minutes as needed. It’s a convenient way to enjoy warm, homemade cookies whenever you want, maintaining their quality and taste.
IS IT POSSIBLE TO REDUCE THE SUGAR IN THESE CHOCOLATE CHIP COOKIES?
You can reduce the amount of sugar in your chocolate chip cookies by adjusting the brown sugar from ¾ cup to ½ cup, slightly affecting the texture but still maintaining the delicious flavor. This tweak helps lower the sweetness while keeping the cookies enjoyable.
WHY DID MY CHOCOLATE MELT IN COOKIE DOUGH?
If the chocolate melts in the cookie dough, it’s likely due to warm dough or small chocolate pieces. Despite this, your cookies will still taste great!
WHY DIDN’T MY COOKIES RISE PROPERLY?
Flat chocolate chip cookies often result from inadequate chilling of the dough or errors in ingredient measurement or substitutions. Properly chilling the dough and ensuring accurate ingredient ratios can help prevent flat cookies, resulting in chewy, satisfying treats.
HOW DO I KNOW IF MY COOKIES ARE BAKED PERFECTLY?
When baking chocolate chip cookies, look for firm edges and a soft center. These cues indicate that they’re set but not overcooked. As cookies cool, they continue to firm up, achieving the desired texture. Mastering these indicators ensures perfectly baked treats every time, whether you prefer chewy or crisp cookies.

Ready to bake? If you love this straightforward recipe, don’t miss out on trying my easy chocolate cake and brownie recipes as well! Happy baking!

BEST BROWN BUTTER CHOCOLATE CHIP COOKIES
Ingredients
- 140 g Unsalted butter
- 150 g Packed light brown sugar
- 55 g white sugar
- 1 egg yolk
- ¾ tbsp. Salt
- ½ Baking powder
- ¼ tbsp. Baking soda
- 170 g All purpose flour
- 113 g Dark chocolate
- 113 g Milk chocolate
Instructions
- Begin by melting butter in a non-stick pan over medium-low heat until it turns brown and gives off a rich, nutty aroma, stirring continuously.
- Lower the heat to the minimum setting and add the sugars, whisking gently for1-2 minutes to help dissolve them completely.
- Removethe pan from heat and let the mixture cool for 5 to 10 minutes until it reachesa warm but not hot temperature.
- Add the egg and yolk, whisking vigorously for 1-2 minutes until the mixture turns smooth and light.
- Incorporateall the dry ingredients and gently fold with a rubber spatula until nearlycombined.
- Gentlyfold in chopped chocolate until it's evenly dispersed, making sure all theflour is well incorporated.
- Divide the dough into 8 balls using a 2-inch scoop, avoiding excessive pressure. Optionally, top each ball with a few additional chocolate chunks.
- Refrigerate the dough balls for a minimum of 30 minutes, ideally 2 hours or more.
- Preheat the oven to 375°F (conventional) and line a large cookie sheet with parchment paper.
- Arrange the chilled dough balls on the sheet, leaving at least 3 inches of space between each.
- Bake for 10–12 minutes, adjusting time for desired cookie texture—soft and gooey or slightly firmer.
Notes
- To prevent crystallization, avoid mixing the butter and sugar over high heat or for extended periods of time. If unsure, remove the butter from the heat before whisking in the sugars.
- Ensure the butter-sugar mixture is cooled sufficiently before adding the egg and yolk to avoid premature cooking.
- When incorporating chocolate, add a small amount initially to ensure it doesn’t melt excessively into the cookie dough.
- Opt for all semi-sweet chocolate instead of a mix of dark and milk chocolate.
- Freeze the cookie dough balls in an airtight container for future use. Bake directly from frozen, adjusting baking time by approximately 2-4 minutes based on desired doneness.
