When I first learned to bake, the Easy Classic Vanilla Bundt cake quickly became my go-to treat, often paired with afternoon tea. Initially, I worried it might be too simple, but I soon discovered that simplicity was exactly what people loved. Hundreds recreated and praised the recipe, prompting me to refine it with some thoughtful improvements.
This improved version remains as easy-going and classic as ever. It’s a foolproof, beginner-friendly cake, with the batter coming together in just 10 minutes. There’s no need for complicated steps or fancy ingredients; just a few basics create a delicious, soft cake ready in under an hour. This cake is the perfect accompaniment for any time of day, whether you’re enjoying morning, afternoon, or evening tea or coffee. Plus, it’s ideal for hosting, making your gatherings even more special.

INGREDIENTS NEEDED

This recipe is delightfully simple, using everyday ingredients you likely already have in your pantry or fridge.
- All Purpose Flour or Plain Flour: The primary base for the cake, providing structure.
- Cornstarch or Corn Flour: When combined with flour, it creates a lighter, tender crumb. It is used to soften the texture.
- Baking Powder: A leavening agent that helps the cake rise.
- Baking Soda: Another leavening agent that works with acidic ingredients for a proper rise.
- Salt: Enhances flavor and balances sweetness.
- Canola is a neutral-tasting oil: It keeps the cake moist and tender but remains liquid at room temperature.
- Melted Butter: Adds rich flavor while contributing to moisture; combines well with oil for texture.
- Sugar: It adds sweetness to the cake and aids in browning.
- Eggs: Provide structure and stability; help bind ingredients together.
- Egg White: Contributes to the cake’s structure without adding too much egg flavor.
- Egg Yolk: Adds richness; can be omitted for a lighter flavor.
- Flax seed eggs: It serves as a vegan substitute for eggs and has similar binding properties.
- Buttermilk: It adds moisture and a slight tang; it can be homemade with lemon juice or vinegar mixed with milk.
- Lemon Juice or Vinegar: It adds acidity, which helps activate baking soda when used to create buttermilk.
- Milk: Used in the batter to maintain moisture and smooth consistency.
- Vanilla: Essential for flavor, higher-quality options like vanilla bean paste or fresh beans yield better results.
- Vanilla Bean Paste or Fresh Vanilla Beans: Provides a stronger, more complex flavor compared to standard extracts.
This combination of ingredients creates a delicious, moist, and flavorful cake that’s perfect for any occasion!
HOW TO MAKE THIS CLASSIC VANILLA BUNDT CAKE
The process is just as simple as the ingredients! It takes under 10 minutes and primarily comes together in a single bowl. Here’s a quick video walkthrough:
Here’s how to do it:
1. SIFT AND MIX DRY INGREDIENTS
To start, it’s essential to sift and mix your dry ingredients for a smooth batter. Begin by gathering your flour, cornstarch, salt, baking powder, and baking soda in a large bowl. Using a sifter with a built-in mechanism can significantly speed up this process. Once you’ve sifted everything together, grab a whisk and gently combine the ingredients to ensure there are no lumps.

Don’t underestimate this crucial step—if you skip it, you risk creating a lumpy and dense batter. So, while your oven is pre-heating to 350F (conventional, no fan), make sure your dry mixture is perfectly prepared. This attention to detail will help you achieve a light and fluffy cake texture that everyone will love!
2. WHISK WET INGREDIENTS
In a separate bowl, it’s time to whisk the wet ingredients together. Start by adding the sugar, followed by the melted butter and oil. Using a hand whisk or even a blender, mix these ingredients for about 1–2 minutes. You’ll notice the mixture gradually changes color and becomes a bit lighter, which is a sign that you’re on the right track.

Next, add the eggs and vanilla, then whisk again for another 1-2 minutes. At this point, the mixture should begin to become aerated and develop a fluffy texture. This step is essential for achieving a smooth and well-combined batter. The texture will improve as the ingredients blend, ensuring that your cake turns out light and fluffy. So, take your time during this process and enjoy watching how the ingredients come together beautifully!

3. FOLD THE DRY INGREDIENTS AND BUTTERMILK INTO WET INGREDIENTS
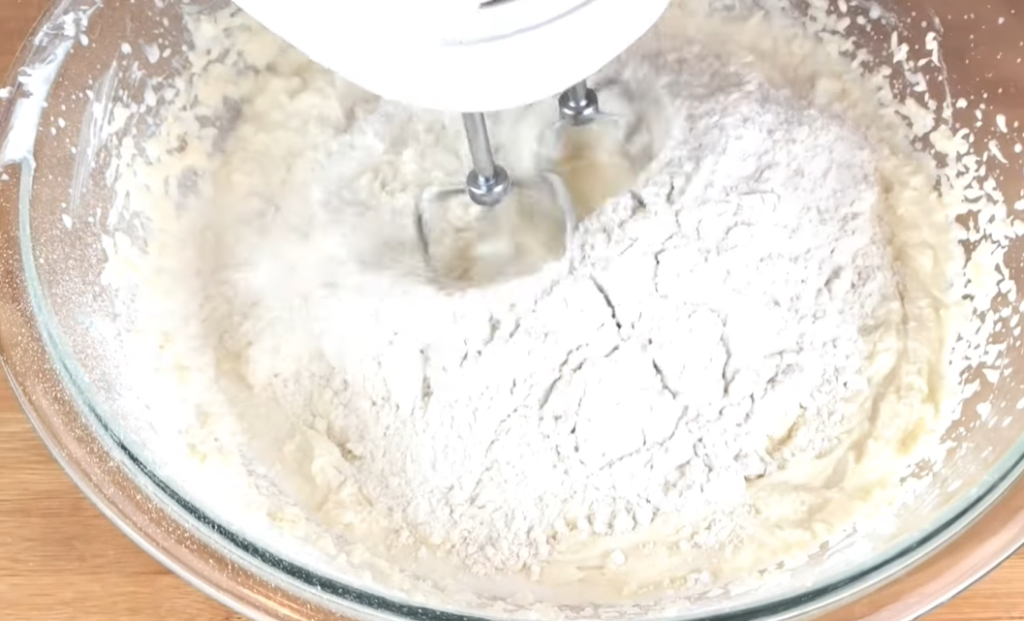
Now it’s time to fold the dry ingredients and buttermilk into the wet ingredients. Start by adding a third of the buttermilk to the mixture and gently whisking it in. Follow this step with a third of the dry ingredients, using a rubber spatula to fold until everything is almost mixed together. This careful process helps avoid any lumps and ensures a smooth batter.

Repeat this method, incorporating a third of the buttermilk and then a third of the flour, until all the ingredients are well combined. It’s crucial not to overmix, as doing so can lead to excess gluten formation, resulting in a rubbery texture for your cake. If you find yourself in a rush, you can whisk in all the buttermilk first and then gently fold in the dry ingredients to keep everything balanced without compromising the quality.
4. PREPARE THE BUNDT PAN
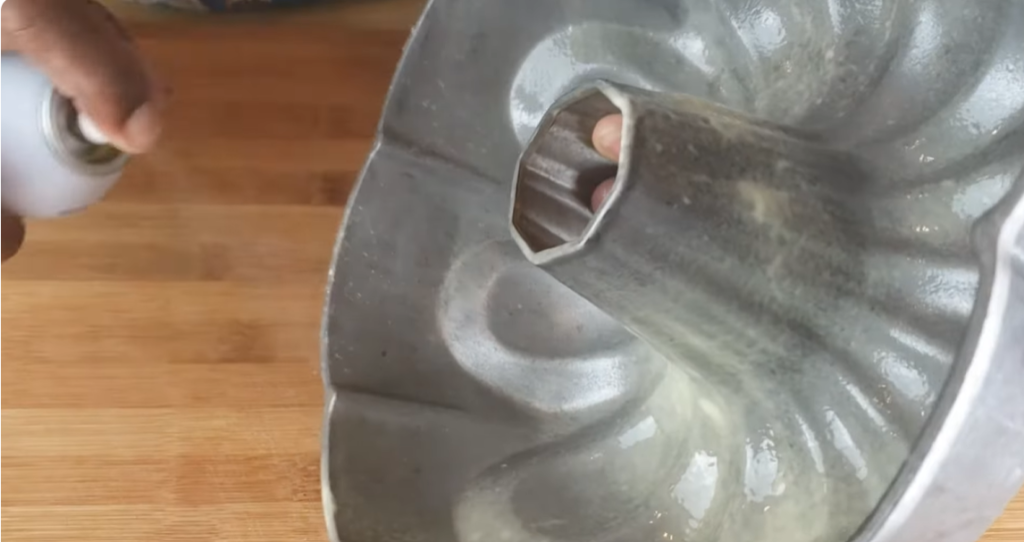
To ensure your cake releases flawlessly from the Bundt pan, start with a clean, nonstick option if possible. In my experience, the best method is to generously brush butter or oil using a pastry brush, making sure to coat every crevice and corner to prevent sticking. After that, add a generous layer of granulated sugar, tapping the pan in different directions to distribute it evenly. Don’t forget to shake off any excess sugar.

While some people prefer using flour, I find that sugar creates a delightful crust on the cake, which adds a pleasing texture. Although it may seem unconventional, I’ve had much better results with sugar than flour, making it my go-to choice for lining a Bundt pan.
5. BAKE!
Now it’s time to bake! Simply pour the cake batter into the prepared Bundt pan and slide it into the oven. This delightful cake will need about 30 minutes to bake, but keep an eye on it. The exact time can vary based on the size, shape, and material of your Bundt pan. To check for doneness, use a toothpick—it should come out clean when the cake is ready.

As the cake bakes, be cautious not to get it overbaked. To avoid any potential disaster, it’s critical to closely monitor it. Once the cake goes in, you can relax a bit, but remember that baking is a delicate balance. Enjoy the anticipation as your kitchen fills with the sweet aroma of freshly baked cake!
6. SERVE AND ENJOY!
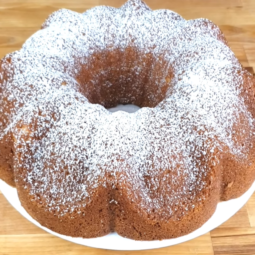
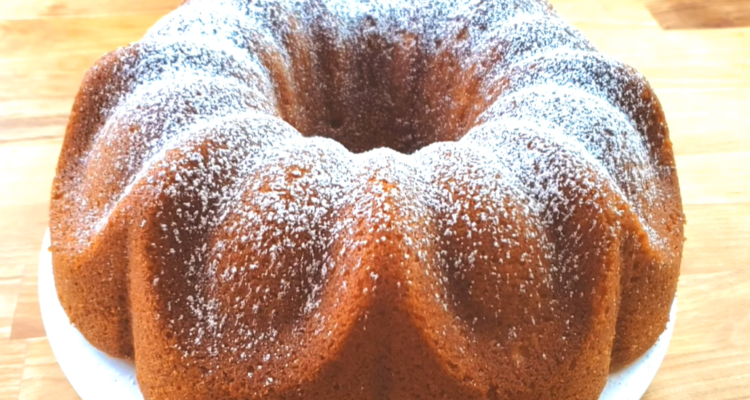
Once your cake has had a chance to cool inside the pan for about 10 minutes, it’s time to carefully turn it out onto your preferred serving stand. This step is crucial, as it ensures the cake maintains its beautiful shape. After it’s out, I love to dust the cake with powdered sugar. Not only does it add a touch of elegance, but it also creates a gorgeous look with basically no effort at all.

Now, you’re ready to share this delightful treat! Whether it’s for a special occasion or just a cozy afternoon, serving this cake will definitely impress your guests. Just remember to enjoy the process, and don’t rush—great flavors take time to develop. Trust me, your hard work will be rewarded with smiles all around!
MY FAVORITE BUNDT PANS
When it comes to Bundt pans, choosing the right one can be enjoyable because of all the different shapes and sizes available.
One great option is the Nordic Ware pan I use; it’s affordable, priced under $20, but remember, it’s not nonstick, so proper preparation is essential.
For those looking for something sturdier, the brilliance pan from their heavy-duty gold line is a fantastic choice. These pans are not only beautifully shaped and heavy, but also sturdy and really nonstick, making them worth the pricey investment of around $35.
Additionally, the Nordic Ware elegant pan features round ridges, creating a very fun look for your cake.
However, my personal favorite has to be the braided rope Bundt pan. This one boasts an incredibly unique shape that makes any cake look beautiful with minimal effort. Each pan has its own charm and utility, making baking as enjoyable as the cakes they make.
VARIATIONS
When it comes to this recipe, the variations you can create are truly endless and so much fun! To achieve this delightful look, simply divide the batter into two bowls. In one bowl, sift in 2 tablespoons of cocoa powder, and then use a spoon to alternately add the two batters into the Bundt pan. This will give you a stunning marble effect that everyone will love.
Another delicious option is the orange cake. Instead of using buttermilk, you can easily switch it out for fresh orange juice. This simple change adds a refreshing twist, resulting in a delicious cake that’s bursting with citrus flavor. With these altered recipes, you can impress your family and friends with your creativity in the kitchen!
FREQUENTLY ASKED QUESTIONS
How can I make this vanilla Bundt cake without using eggs?
If you don’t eat eggs, you can easily substitute them with flax seed eggs in this recipe. For each egg, mix 1 tablespoon of ground flax seed with 3 tablespoons of water. So, for this recipe, you’ll need 2.5 tablespoons of ground flax seeds mixed with 7.5 tablespoons of water.
Combine and refrigerate the mixture for 10 minutes until it becomes gloopy. Follow the recipe as usual, and enjoy your egg-free vanilla Bundt cake!
Why does my cake have an egg-like flavor?
If your cake has an eggy taste, it might be because you didn’t add enough vanilla. Using good-quality vanilla is essential for the best results. I recommend vanilla bean paste, which offers a rich and concentrated flavor.
To enhance the delicious aroma and flavor, you can also try browning your butter before incorporating it into the batter. This technique not only intensifies the taste but also adds a unique nutty undertone that complements the vanilla perfectly.
What can I use instead of buttermilk?
If you find yourself out of buttermilk, don’t worry! You can easily make a substitute for yourself in no time. For every cup of buttermilk needed, simply mix 1 cup of whole milk with 2 tablespoons of either lemon juice or vinegar.
The mixture should become a bit clumpy and thick, resembling the texture of separated buttermilk. This homemade substitute works well in recipes and provides the same tangy flavor and acidity as store-bought buttermilk.
How do I bake a cake without a Bundt pan?
Absolutely! You can still bake your cake even if you don’t have a Bundt pan. A 9″ round pan or a 9×9″ brownie pan will be a good substitute.
Just remember that the baking time will be less compared to using a Bundt pan, so check your cake around the 20–25 minute mark. This way, you can ensure it’s perfectly baked without being undercooked or overdone.


EASY CLASSIC VANILLA BUNDT CAKE
Ingredients
- 195 g All purpose flour
- 35 g Cornstarch
- 2 tbsp. Baking powder
- ¼ tbsp. Baking soda
- ½ tbsp. Salt
- 100 ml oil
- 60 g Melted butter
- 220 g Granulated sugar
- 2 Eggs + 1 egg white
- 120 g Buttermilk or sub ½ cup milk + 1 tablespoon lemon juice or vinegar
- 2 Teaspoon vanilla bean paste
Instructions
- Preheat your oven to350F (conventional setting).
- Sift the flour, cornstarch, baking powder, baking soda, and salt into a bowl and mix well. Set aside.
- In a separate bowl, whisk together the sugar, oil, and butter for 1-2 minutes using a hand mixer until the mixture begins to change color.
- Incorporate the eggs, egg white, and vanilla, then continue whisking for an additional 1-2 minutes.
- Add a third of the buttermilk and whisk to combine the wet ingredients.
- Add a third of the dry ingredients and fold with a rubber spatula gently until well mixed.
- Continue this process, adding the buttermilk and dry ingredients in thirds, until you have thoroughly combined everything.
- Prepare your Bundt pan by brushing it generously with oil and dusting it with granulated sugar. Pour the batter into the pan.
- Bake for approximately 30 minutes. The exact time may vary, so check with toothpick to ensure it comes out with moist crumbs.
- Let the cake sit in the pan for 10–15 minutes before gently removing it.
- Dust with powdered sugar, and serve!
Notes
For optimal flavor, aim to use high-quality vanilla, such as vanilla bean paste.
